Moisture Control & Waterproofing: Protecting Your Home from the Inside Out
Have you ever walked into a room and noticed a musty smell or spotted peeling paint and thought, “Is this just age, or something worse?” You might be looking at the early warning signs of moisture problems. And here’s the thing: moisture damage doesn’t start as a big leak — it often begins with small, barely noticeable issues that quietly wreak havoc on your home over time.
Moisture control is more than just keeping things dry. It’s about protecting the health of your family, the structural integrity of your home, and the value of your property. When moisture sneaks in — whether through the foundation, roof, plumbing, or poorly sealed areas — it can lead to mold growth, rotting wood, damaged drywall, and even foundation cracking. If left untreated, these problems don’t just become expensive. They can become dangerous.
The Hidden Cost of Ignoring Moisture
Think of moisture as a slow, silent invader. Over time, unchecked humidity or water seepage can deteriorate your subfloor, warp your hardwood, and eat away at your insulation. One of the biggest financial risks is that these issues often remain hidden until they become major repair jobs. By then, you’re not just replacing drywall. You could be redoing flooring, tearing out cabinetry, or even dealing with pest infestations that thrive in damp environments.
Poor indoor air quality is another underrated consequence. When moisture accumulates in enclosed areas, it creates an ideal breeding ground for mold and mildew. This leads to respiratory problems, especially for children, seniors, and anyone with asthma or allergies. If you’ve ever Googled mold risks in poorly ventilated spaces, you already know how dangerous it can be when moisture control is ignored.
Moisture Doesn’t Always Mean Flooding
People often assume that moisture issues come from big disasters like flooding or burst pipes. But in reality, most of the damage comes from everyday sources: cooking, showering, drying clothes indoors, and even breathing. Combine those habits with poor ventilation or bad building design, and you’ve got a long-term moisture problem in the making.
Humidity from showers can lead to surface condensation and eventually mold in bathrooms. Leaky windows or roofs can drip water into wall cavities where it festers. And homes with poorly insulated crawl spaces or basements may experience ground moisture intrusion, which can evaporate upward and raise humidity levels throughout the house.
You might not notice anything right away, but over time you’ll start to see warped baseboards, stained ceilings, or musty smells. These are all red flags.
Early Warning Signs You Shouldn’t Ignore
Wondering whether your home might be at risk? Here are some subtle signs that moisture could already be causing problems:
- Paint bubbling or peeling
- Persistent musty odor, especially in basements or bathrooms
- Rust on metal fixtures
- Cracking or separating tile grout
- Floorboards or cabinetry swelling or warping
- Windows that sweat or have constant condensation
- Staining or discoloration on walls or ceilings
If any of these are familiar, your home might already be suffering from excess moisture — even if you haven’t seen visible water. This is why how to detect hidden leaks behind walls is a popular topic among homeowners and professionals alike. Catching the problem early can make the difference between a quick fix and a costly renovation.
How Much Moisture Is Too Much?
Ideal indoor humidity levels are generally between 30% and 50%. Once it rises above 60%, you’re in the danger zone for mold, mildew, and dust mites. Unfortunately, most people don’t measure indoor humidity — and by the time they feel it, it’s already too high.
Using a hygrometer, a small and inexpensive device, can help you monitor your home’s humidity. You can place one in your basement, bathroom, or laundry room and check it weekly. If humidity levels are consistently above recommended levels, it’s time to take action.
It’s Not Just About Drying — It’s About Managing
The goal of moisture control isn’t just to dry things out when they get wet. It’s to prevent them from getting wet in the first place. This means creating proper airflow, sealing up entry points, and using materials and systems that actively resist moisture.
In upcoming sections, we’ll dive deeper into how to waterproof key areas of your home and choose the right materials. But first, remember this: moisture problems don’t resolve themselves. The earlier you tackle the issue, the more money — and headaches — you’ll save down the line.
Waterproofing 101: Inside Your Home’s Most Vulnerable Zones
Ever wondered, “Where does water usually sneak into the house?” If you’ve dealt with moisture before, you know that water doesn’t need a big opening to become a big problem. A small crack, a poorly sealed joint, or an outdated fixture can be enough to invite in trouble. That’s why targeted waterproofing isn’t just a precaution — it’s essential.
Let’s walk through the most moisture-prone zones in your home and how to defend them before they cost you time, money, and sanity.
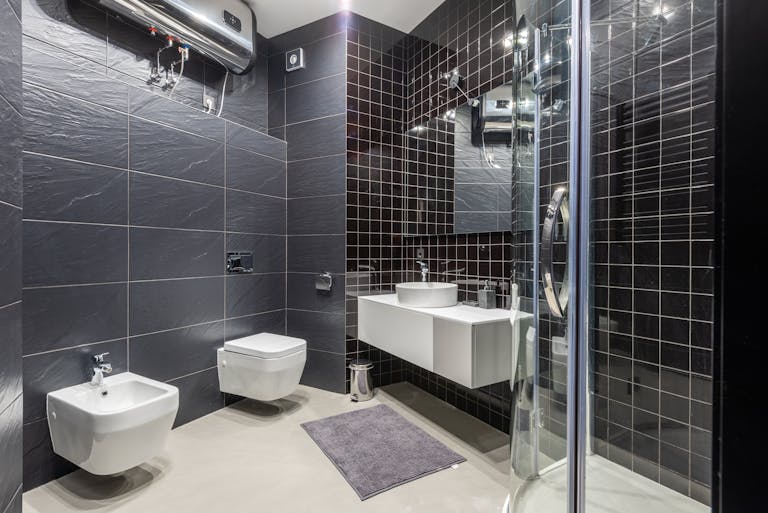
Bathrooms: The Front Line of Moisture Control
Looking for the number one culprit for household moisture? It’s your bathroom. Every shower, bath, and handwash sends steam and splashes into the air and onto surfaces. Without proper protection, that water finds its way into your grout, drywall, and subfloor.
That’s why learning how to waterproof your shower area is non-negotiable. A waterproof membrane behind the tile, sealed corners, and slope-to-drain floors are just the beginning. Even a beautiful tile job can fail if the underlying system doesn’t repel water. And don’t forget: tile grout is porous. That’s one reason so many homeowners ask, what causes tile grout to crack? Water intrusion, temperature changes, and subfloor movement all play a role. Once that grout fails, moisture starts seeping into areas you can’t see.
Also, consider replacing traditional drywall with cement board or waterproof panels in wet zones. And use mold-resistant caulk around sinks, tubs, and corners where water likes to hide.
Kitchens: Small Leaks, Big Risks
You might not think of your kitchen as a moisture zone, but it’s packed with plumbing lines, appliances, and high-humidity activities. The area beneath your sink is one of the most overlooked leak zones in the house. A tiny drip from a loose fitting can soak into cabinets and floorboards for months before you notice.
Dishwashers, ice makers, and garbage disposals are other hidden hazards. They’re often installed and forgotten — until the damage is done. Check under and around your appliances every few months for signs of water pooling or staining.
It’s smart to use water-sensing leak detectors beneath sinks and behind appliances. These devices can alert you at the first sign of moisture, giving you a chance to fix it before damage spreads.
Basements & Crawl Spaces: Ground-Level Invaders
If you’ve ever Googled how to detect hidden leaks behind walls, chances are you were dealing with a basement moisture mystery. These spaces are notorious for water intrusion, especially during heavy rains or snowmelt. Even homes without full flooding can experience problems due to vapor transmission — water rising from the ground below and infiltrating through unsealed concrete.
The fix? A combination of exterior and interior solutions. On the outside, proper grading, gutter downspouts, and exterior waterproof coatings can reduce water pressure on your foundation. Inside, sealants, sump pumps, and vapor barriers help manage any moisture that does make it through.
Crawl spaces are equally vulnerable. An exposed dirt floor acts like a sponge, pulling ground moisture upward into your home. Sealing the crawl space, adding a vapor barrier, and ventilating or dehumidifying the area can prevent moisture buildup, rot, and mold growth.
Attics: Condensation’s Favorite Hideout
Most people don’t associate attics with water damage, but they should. Warm, moist air from your home can rise and condense in the attic, especially in colder climates. Without proper ventilation, this moisture accumulates on rafters, sheathing, and insulation.
The result? Mold. Rot. Damaged insulation. And if you have a roof leak, the attic is the first stop for that water — often long before it drips into your living space.
Make sure your attic is well ventilated with soffit and ridge vents, and that insulation doesn’t block airflow. You should also inspect your roof annually for loose shingles, flashing gaps, and chimney cracks.
Entry Points: Doors, Windows, and Flashing
Anywhere the outside meets the inside is a potential weakness. Poorly sealed windows can allow water in during storms. Outdated flashing around rooflines or chimneys can funnel rain straight into your walls. And older doors, especially in basements or walkouts, often lack the proper waterproof threshold systems.
Use weather-resistant sealants, install modern flashing systems, and inspect these areas seasonally. Don’t wait for stains or swollen wood to appear — those are signs you’re already too late.
Choosing the Right Waterproofing Materials & Tools
Wondering what products actually work to keep moisture out for good? It’s a fair question — the waterproofing world is full of options, from membranes and sealants to paints and panels. But not all materials are created equal, and the right choice often depends on where the water risk lives and what kind of structure you’re protecting.
Let’s break it down so you don’t end up overbuying or, worse, under-protecting.
Membranes: Your First Line of Defense
If you’ve ever watched a bathroom remodel from the ground up, you’ve likely seen some sort of waterproof membrane being applied behind the scenes. These flexible or rigid barriers are installed before the visible surface — like tile or drywall — and they block water from reaching structural layers.
For showers and wet areas, you’ll want to choose either a liquid-applied membrane or a sheet membrane. Both work, but they’re applied differently. Liquid membranes are rolled or brushed on and cure into a rubbery layer. Sheet membranes are applied in sheets and sealed at the seams.
Either option can provide serious protection when installed properly. They’re especially critical in places where water will hit daily, like shower walls and floors.
Sealants and Caulks: Closing the Gaps
Have you noticed cracking or peeling caulk around your tub or sink? That’s your signal it’s time to re-seal. Gaps in seams are one of the most common entry points for water — and one of the easiest to fix.
Choose a mold-resistant, waterproof silicone sealant for areas like bathrooms and kitchens. These products are specifically made for high-moisture environments and won’t degrade like basic latex caulks. Smooth it on evenly and let it fully cure before exposure to water.
For exterior doors and windows, use weatherproof caulks designed to expand and contract with temperature changes. Sealing those spots not only keeps water out but also helps reduce drafts and energy loss.
Flooring That Fights Moisture
If you’re planning to update your floors, waterproofing should be part of your design plan — especially in basements, bathrooms, kitchens, or laundry areas.
Not sure what’s safe to install? We’ve already broken this down in our guide to the best waterproof flooring options, but here’s a quick recap: luxury vinyl plank (LVP), ceramic tile, and sealed concrete are top contenders. These materials resist water intrusion, won’t swell like wood, and clean up easily after spills or leaks.
Avoid traditional hardwood in moisture-prone rooms unless it’s specifically engineered for damp conditions. And if you install tile, remember the grout needs sealing, too.
Paints and Coatings: Bonus Protection or False Security?
Waterproof paints and masonry coatings can be helpful — but they’re not magic. These products are often applied to basement walls, garage floors, or exterior concrete to reduce water penetration. They work best when used as part of a larger system, not a standalone solution.
The biggest mistake homeowners make? Thinking a coat of waterproof paint will fix a leak. If moisture is already coming through the wall, you need to address the source — whether it’s outside drainage, cracks, or hydrostatic pressure.
Once the problem is resolved, a high-quality waterproof coating can extend protection and improve aesthetics.
Sump Pumps and Drainage Systems
For basements that battle high water tables or regular flooding, sump pumps are game changers. These systems collect water that seeps in and pump it away from the foundation, keeping your space dry.
Interior drainage systems like French drains can also direct moisture into the sump pit before it ever touches your flooring or walls.
Make sure your sump pump includes a battery backup — especially if you live in an area prone to power outages during storms. There’s nothing worse than a failed pump in the middle of a flood.
Vapor Barriers and Insulation Upgrades
Don’t forget the invisible layers. A vapor barrier can be a plastic sheet laid beneath concrete slabs or inside walls to prevent moisture from moving through porous materials. These are especially useful in crawl spaces, basements, and behind drywall in humid areas.
Pairing vapor barriers with moisture-resistant insulation like rigid foam or closed-cell spray foam helps you maintain a dry, temperature-stable home. Just make sure everything is installed with airflow and ventilation in mind. Trapping moisture in walls without a path to escape can actually worsen the problem.
Preventative Maintenance and Long-Term Moisture Strategies
What’s the best way to stop moisture problems before they start? That’s the question every homeowner should be asking — because once water damage sets in, it gets expensive fast. The key to long-term moisture control isn’t just what you install, but how consistently you maintain your systems, spot early warnings, and adapt as your home ages.
Let’s walk through the proactive steps that actually work.
Start With the Air: Ventilation Is Everything
Ever walk into a bathroom after someone’s showered and the mirrors are fogged up for 30 minutes? That lingering humidity is exactly what encourages mold and mildew to take root.
Good airflow is your first defense. Make sure every bathroom has a vent fan rated appropriately for the room’s square footage. Don’t just install it — use it every time. Let it run for 15 to 20 minutes after showers or baths.
If your home has a basement or attic, consider adding ventilation there too. Poor airflow in these tucked-away areas creates stagnant, damp air — the perfect condition for mold colonies to grow.
Want to dive deeper into this? We’ve broken down the mold risks in poorly ventilated spaces, and how airflow can make or break your home’s health.
Check the Usual Suspects Monthly
Certain areas of your home are more prone to hidden leaks or moisture buildup. Keeping a routine maintenance schedule, even just once a month, helps you spot warning signs before they lead to mold, rot, or structural damage.
Here’s what to check:
- Under sinks: Look for puddles, condensation, or warped cabinet bases.
- Around toilets: Feel for soft floors or loose caulking.
- Behind your washer: Inspect hoses for cracks or rust.
- In the basement: Watch for water stains, musty smells, or peeling paint.
- Near windows: Check for condensation between panes or bubbling paint on the sill.
Water issues often show up in small ways first. If you catch those early signs, you can avoid big repair bills later on.
Don’t Ignore Cracked Grout or Caulking
It’s tempting to overlook a small crack in your shower wall or a missing line of caulk behind your sink. But those little openings let water seep through layer by layer. Over time, moisture builds up behind tile or drywall — and it’s not long before mold starts spreading unseen.
We’ve already discussed what causes tile grout to crack, and how to fix it. The short version? Inspect your tile lines regularly. Regrout or reseal when needed, and always use waterproof, mold-resistant products.
The same applies to exterior caulking around windows and siding. A small breach there can let rainwater trickle in unnoticed, especially during Seattle’s wetter seasons.
Upgrade Your Exterior Drainage Game
Inside waterproofing systems are essential — but they won’t hold up if your outside drainage is failing. Rainwater pooling near your foundation will eventually find its way in.
Start by making sure your gutters and downspouts are clean and directed at least 5–10 feet away from your home. Add extensions or splash blocks if needed.
Grading is another major factor. The soil around your home should slope away from the structure, not toward it. If your landscape creates a bowl around the foundation, water will settle where it shouldn’t.
French drains, dry wells, or rain gardens can also help redirect water on properties with chronic drainage issues.
Watch for Silent Moisture Intruders
Some of the worst water problems are invisible — until it’s too late. That’s why early detection matters.
We’ve written a full guide on how to detect hidden leaks behind walls, but here are a few tips:
- Use a moisture meter to test drywall or flooring.
- Watch your water bill for unexplained increases.
- Look for warm spots or discoloration in ceilings or floors.
- Sniff out musty odors, even if no mold is visible.
Smart leak detectors and water alarms are now affordable and easy to install. Place them under sinks, near the water heater, and behind appliances. These gadgets alert you to drips or floods in real time via smartphone — often before any damage occurs.
Don’t Skip Seasonal Checks
Weather patterns shift how and where water tries to get in. That’s why seasonal moisture maintenance is smart — especially in spring and fall.
In the fall, clean gutters and downspouts before the rain hits. Inspect the roof for cracked flashing or missing shingles that could allow water to sneak in.
In the spring, check for signs of water pooling near the home after snow melts or heavy rains. Test your sump pump, examine crawl spaces, and reseal any expansion joints or exterior concrete cracks.
Taking a day or two each season to do a moisture audit pays off in peace of mind — and avoids massive mold remediation or foundation repair bills.
Final Thoughts: Moisture Control Isn’t Optional — It’s Foundational
You can remodel your kitchen or repaint your walls all you want — but if water is silently seeping behind those surfaces, none of it will last. Moisture control and waterproofing are about more than just comfort. They protect the structure, air quality, and long-term value of your home.
By understanding the risks, choosing the right materials, and staying consistent with maintenance, you can stop mold, rot, and water damage before it even begins.
Need more tips? Check out our deep dives on how to waterproof your shower area or learn why open vs. closed bathroom concepts affect moisture control more than you might think.